Start a WordPress Blog – Step by Step Tutorial
Last modified: June 25, 2026

Starting a WordPress blog doesn’t require technical experience. The platform handles most of the complexity for you, letting you focus on what you want to publish. This guide walks through every step, from registering a domain name to writing your first post, in plain language.
WordPress powers around 40% of all websites, including major news outlets, e-commerce stores, and personal blogs. That scale means there’s a large community, thousands of themes and plugins, and plenty of documentation when you run into questions.
Most people finish the setup steps below in 30 to 60 minutes. Follow them in order and you’ll have a live blog on a custom domain with a theme you’ve chosen and at least one test post ready to publish.
* This button will show the rest of the post and open up an offer from a vendor
About this Guide and how to Start a Blog
This guide covers the following steps in order:
- Getting a domain name and web hosting
- Installing WordPress on your hosting account
- Choosing and installing a theme
- Removing default plugins you don’t need
- Creating your first blog post
- Installing a plugin to add extra functionality
- Viewing and sharing your new blog
- What to do next once the basics are in place
Purchase a Domain and Web Hosting
If this means nothing to you, we will explain briefly.
What is a Domain?
Think of a domain name as your address. When you want to invite a friend over to visit you, you need to give them your address, right? Same thing here. Every single site on the internet has a domain name. For example:
- Google.com
- Yahoo.com
- Scanwp.net
- etc.
What is Web Hosting?
Web hosting is what lets people actually reach your domain when they type it in. It’s what enables your “Address” to be reachable. If the domain is your address, a host is the physical house / apartment.
In order to start a blog you MUST have a domain name and web hosting.
How Much Does That Cost?
Normally domains go for around $10 – $15 a year if you choose the regular TLDs (.com, .net, .info etc.) and shared web hosting goes for around $8 – $15 a month.
For the sake of this tutorial we are offering a huge discount through Bluehost – which are offering a free domain name and monthly hosting for under $4 a month.
Bluehost are officially recommended by WordPress themselves and are one of the most recommended hosting companies overall.
To follow this tutorial, click on the following button and start following along (side by side):
Go to BlueHost
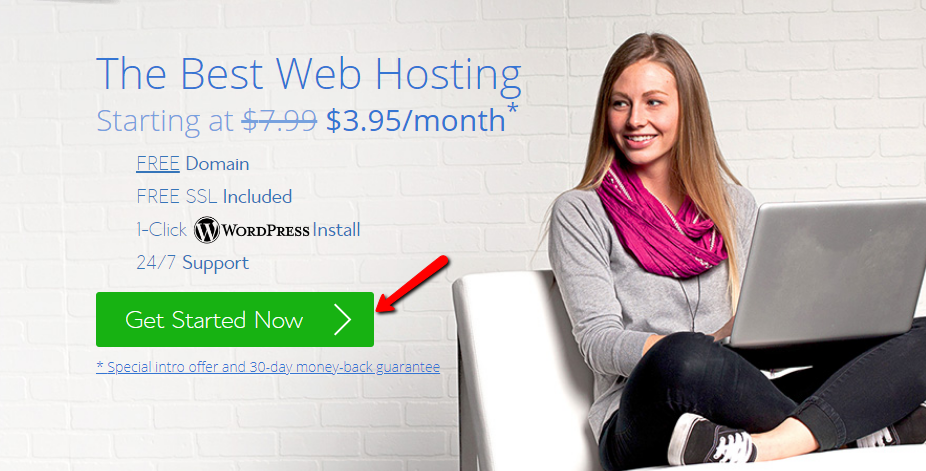
After clicking the above button you will reach a page that looks just like this, now click on the green “Get started now” button to start the signup process.
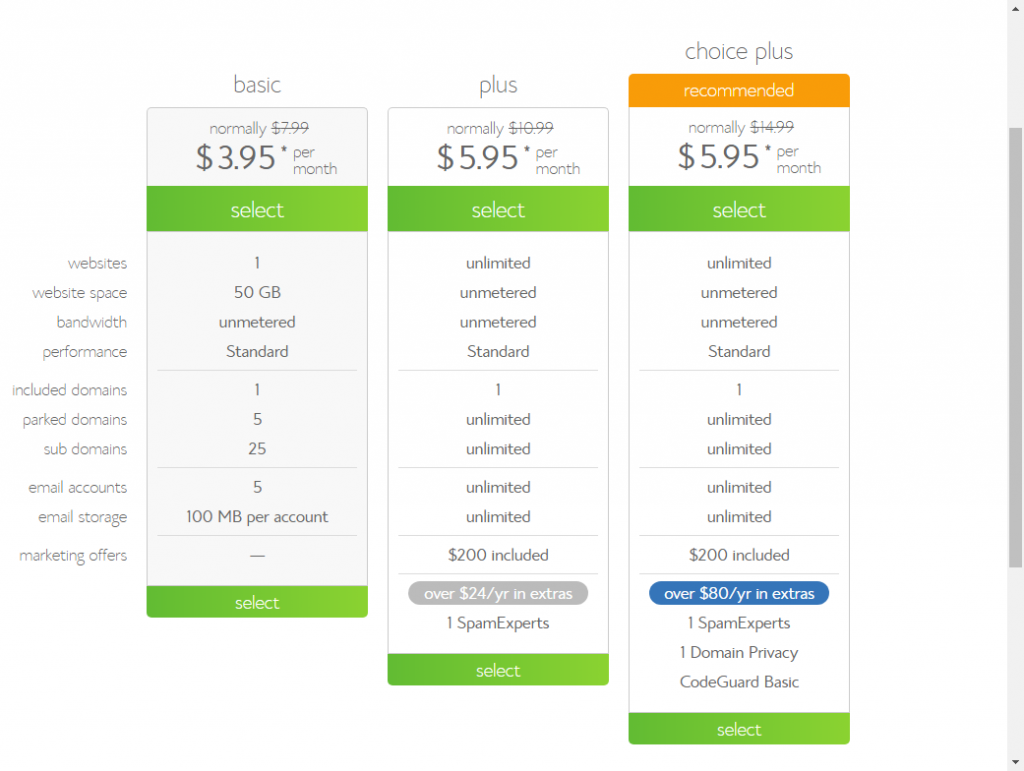
If you plan on building only 1 website, click the “select” button under the “Basic” program on the left, otherwise just choose the “Choice plus”(recommended). Click the correct green button to continue.
Choosing a Domain Name
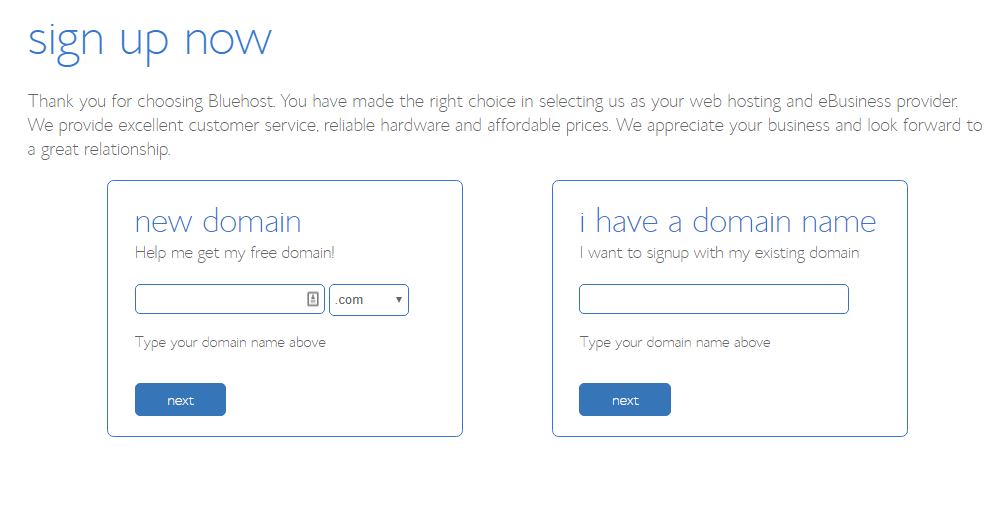
In the left box, choose an available domain name and TLD(.com, .net etc.) and click “Next”.
Account and Package Information
On the next page you will need to fill in your personal information and below that you will need to choose your desired package and extras.

We recommend you choose the 3 year plan which gives you the best value for your money but you can choose whichever package suits you best.
Next you can choose to add package extras. None of them are mandatory, you could uncheck everything if you don’t specifically need any of them.
The last step is to fill out your payment details, finish the registration process and wait to get your login details.
Install WordPress on Your Server
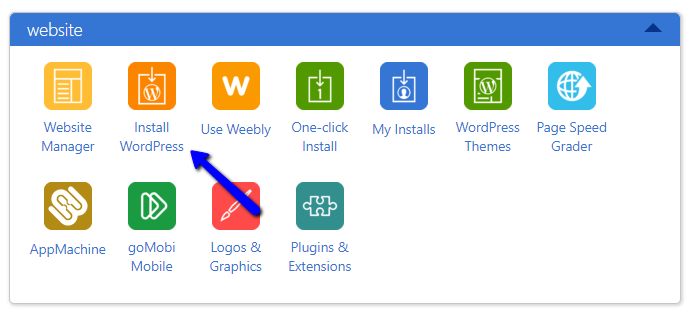
After logging into your new hosting account, find the “Website” section and click on “Install WordPress”
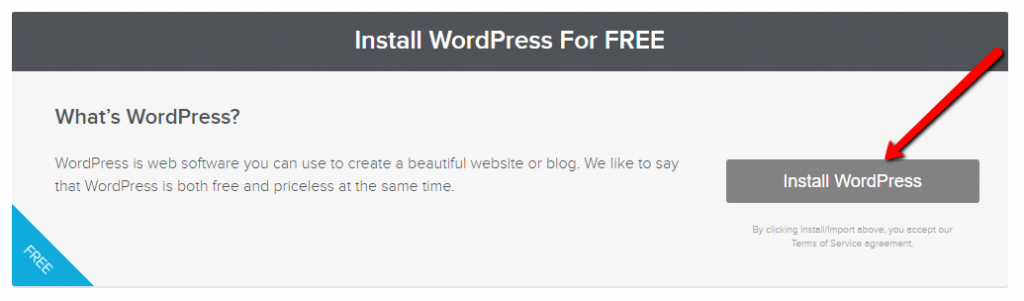
Next you will be taken to a program called “QuickInstall” – here you need to choose “WordPress” again.

Next click on “Install WordPress”
After clicking on the above button, a new section will open up where you need to fill in the new blog information:
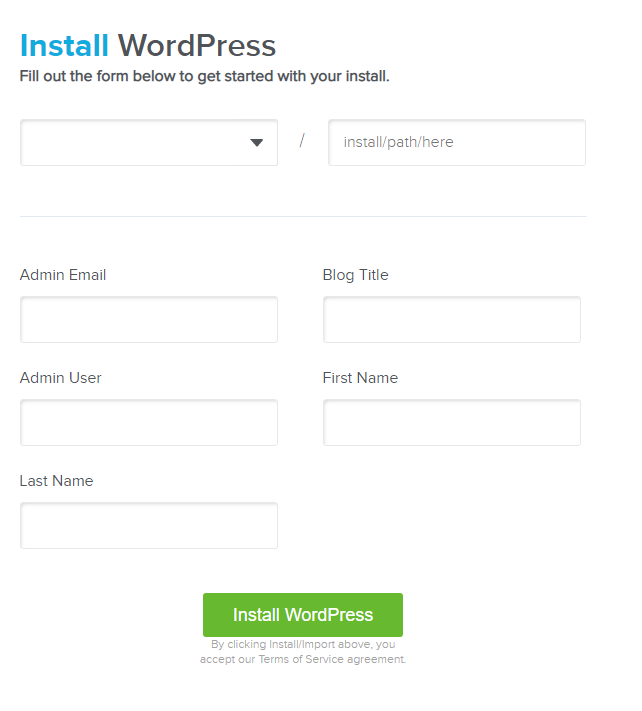
- Choose your domain from the dropdown on the top left (on your new installation it might just show up without a choice)
- Within “Install path here” don’t add anything unless you are installing on a sub directory. Such as
"yoursite.com/blog/" - Now just fill in the WordPress information – Email, title, username, name
- Finally – click on “Install WordPress”
Now a popup will “pop up” and ask you if you want to buy a WordPress theme through them. Just click on the bottom link just like in the image below.

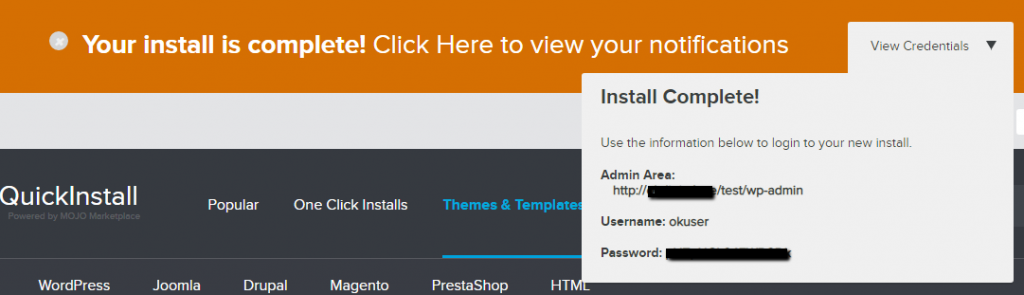
When the installation is finished you will see a message at the top of the screen.
Click the “View credentials” and you will get your login information.
Make sure you save this information in a file so you don’t forget it (You will also get an email with the same information as backup). Once you save it, click on the “admin area” link.
Not that hard, right?!
You just successfully installed your very first WordPress blog.
Log In To Wordpress
After clicking on the link you will get to your blog’s login page. Put your username and password in the appropriate fields and log into the blog.
Remove Plugins
Before we start this part – if you’ve never used WordPress before you might want to learn a bit about the admin area.
Since we used a free script to install our WordPress blog, it also added a few plugins that we might not really need, so we’ll head over to the “plugins” page (search for “plugins” on the left sidebar and click it.
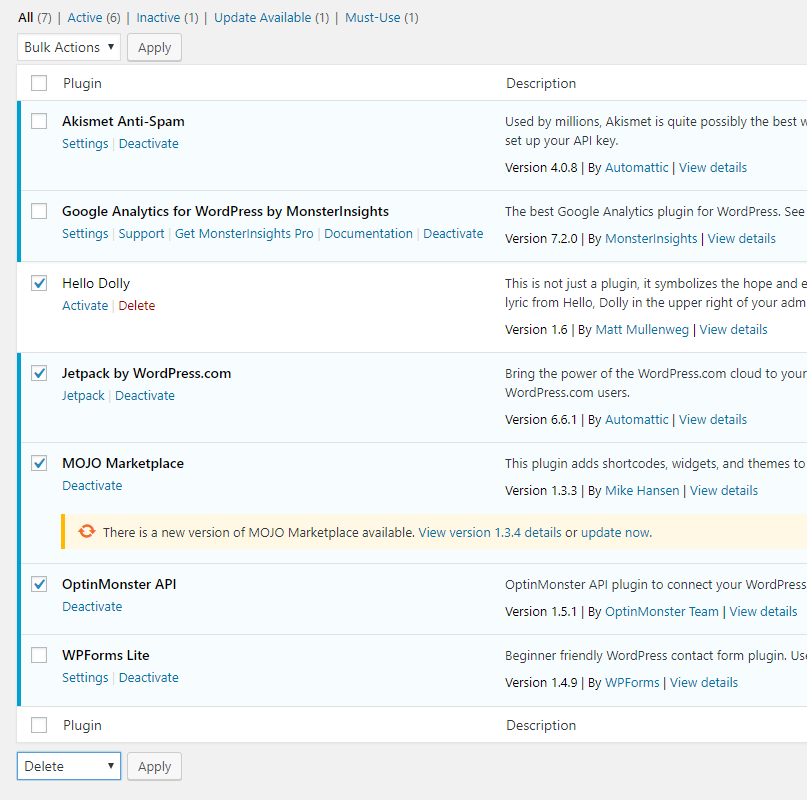
*This part is not mandatory and I chose the useless plugins for me – you could choose to remove more or fewer according to your specific needs.
As you can see, I checked a few of the plugins that I don’t want and chose “delete” from the dropdown menu. But in reality you’ll actually have to choose “deactivate” first and then do the same process with “delete”.
After clicking “apply” the plugins shouldn’t appear in the plugin area.
Selecting a WordPress Theme
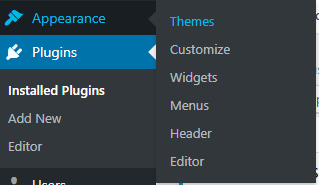
First, hover above the “Appearance” link on the sidebar and click on the “Themes” link.
On this page you will see the theme being used as a default, a couple other available ones that are installed automatically and the option to add more.
If you are looking to start a blog, the default theme might be exactly what you need. However, if you are looking for something different – this is your chance.
Install a New Wordpress Theme
There are 2 main ways to install WordPress themes:
- Install free themes from the WordPress repository through the theme panel
- Install themes by uploading a zip file
Install Free WordPress Themes Using the Repository
The WordPress Theme repository is a huge library with tens of thousands of completely free WordPress themes. WordPress enables you to install them directly from the admin.
If you click the “Add new theme” square on the far right you will be taken to the correct page. You can filter between several types of themes or use the search on the right.
For the purpose of this tutorial I’m going to demonstrate installing a theme called “Fastest”.
- Write the word “fastest” in the search bar
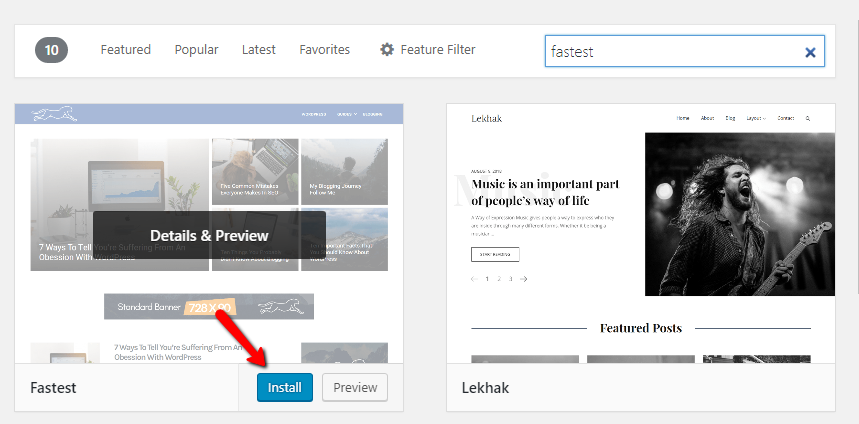
- Hover above the theme and click “Install”
- When installed click “Activate”
- When activated right click “Customize” and open in new tab (not mandatory – just easier)
In the customize page there are many customizations you can do including style, colors etc. When you are finished, just click “Publish” (if you opened this page in a new tab you can close it completely).
Installing a Theme Using a Zip File
This option is usually used to upload themes that were purchased from external sites that sell WordPress themes (but not only). Here are some of the top vendors that sell the best WordPress premium themes:
The way to upload a zip file is simple, from the same page we uploaded a new repository theme, click “add new” and upload your zip file. It’s as simple as that.
Creating a Blog Post
Hover above the “posts” in the sidebar and click on “Add new”.
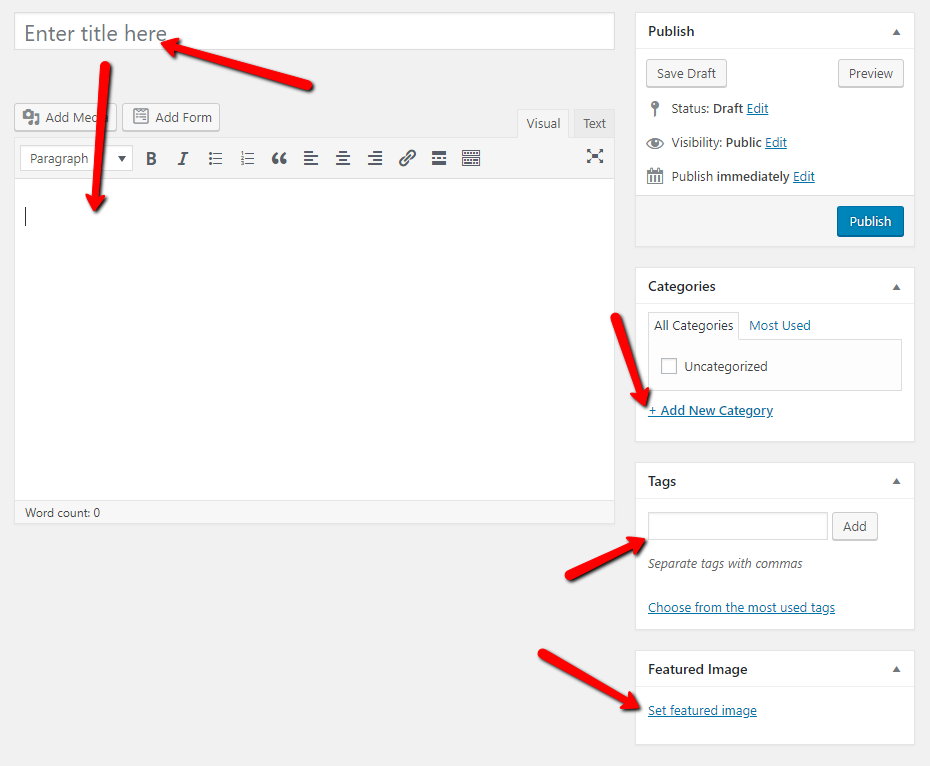
Now you have a few simple tasks that need to be done on every new post you add:
- Add a post title
- Add the post text
- Add a relevant category to your post
- Add a featured image
- Add relevant tags (This isn’t mandatory)
Last – click “Publish”
Congratulations! You just published you very first blog post!
Install a Plugin on Your Blog
If you are not familiar with WordPress plugins, you should read about what plugins are. Essentially plugins are sort of apps that can add extra functionality to your theme. It could be a contact form, a slider, SSL functionality, a page builder and much more. You can find many options on our WordPress plugins category.
The installation of a plugin is similar to installing a theme.
- Hover above the “Plugins” link on the sidebar and click on “add new”
- Now either choose a plugin from the plugin repository or upload a zip file above – same exact process as installing a theme
View Your Blog
Now you are pretty much finished with your initial installation and layout. To view your site and share it with friends, just enter the URL in your browser’s URL field or hover above your site’s name in the top left area of your admin, and click on the “visit site” link to see what you just created.
Start a Blog - the Next Steps
Once your blog is set up, the ongoing work is what separates sites that grow from ones that sit untouched for months.
Publish consistently. Pick a schedule you can actually keep. Once a week is better than every day for a month followed by silence. Google favors sites that add fresh content regularly, and readers do too.
Learn basic SEO. You don’t need to become an expert, but understanding how to use keywords in your titles, how to write a good meta description, and how to build internal links between your posts will make a measurable difference over time. If your site runs Yoast SEO or Rank Math, those plugins guide you through the basics on every post.
Set up Google Analytics and Google Search Console. Both are free and give you data on how many people are visiting your blog, which posts they read, and which search queries are sending you traffic. The Google Site Kit plugin connects both in one step.
Start building an email list early. Even a simple opt-in form with a basic email provider lets you reach your readers directly, independent of search rankings or social algorithms. It’s much easier to grow an email list from the start than to build one later. Check out the guide to WordPress plugins for email marketing options that work well with WordPress blogs.
Focus on topics you know well. The blogs that last are written by someone who actually knows and cares about their subject. Writing about what you know produces better content, takes less time, and builds reader trust faster than chasing whatever topic seems popular that week.
- About this Guide and how to Start a Blog
- Purchase a Domain and Web Hosting
- Go to BlueHost
- Choosing a Domain Name
- Account and Package Information
- Install WordPress on Your Server
- Log In To Wordpress
- Remove Plugins
- Selecting a WordPress Theme
- Install a New Wordpress Theme
- Creating a Blog Post
- Install a Plugin on Your Blog
- View Your Blog
- Start a Blog - the Next Steps
Related Posts


 Website Maintenance – Use Promocode: scanwp
  Advanced JetPlugins for Elementor
  Semrush 14 days trial
  Kinsta – Managed WordPress Hosting
  Bluehost Hosting