
How to Add Google Analytics to WordPress
Last modified: June 18, 2026

If you have a WordPress website and don’t use Google Analytics (yet), this post is for you. This post will teach you the entire process of how to add Google Analytics to WordPress. But before we go into creating an Analytics account, let’s understand what Google Analytics is, how it can help us and why we should want to add it to our WordPress website.
* This button will show the rest of the post and open up an offer from a vendor
What is Google Analytics?
Google Analytics is one of the most popular (free) tools that web marketers use. There probably aren’t too many websites out there that don’t have Analytics built in. Google Analytics will help you understand basically anything you want about your traffic. Here are some key features Google Analytics offers:
- Amount of traffic per set timeframe
- Traffic comparison between timeframes
- Traffic source
- Traffic medium
- Country
- Landing page
- Exit page
- Average time on page
- User demographics
- Desktop / mobile
- Mobile device
- Average amount of page views
There are so many more options you can get out of Analytics, these are just the tip of the iceberg. Even if you are not an internet marketer you can understand the importance of having Google Analytics on your WordPress website.
The first step is to create a Google Analytics account, so let’s get started:
Create a Free Google Analytics Account
First of all, log into your Google account that you want to use in for your Analytics account. Then go to the Google Analytics signup page and start creating your account. When landing on the signup page, this is what you will see. Now, click on the “Sign Up” button.

After clicking the signup button, you will reach the signup page, this is what you need to make sure you do here:
- Choose “Website” since we’re adding this account to our WordPress site
- Choose an account name
- Choose a website name
- Add your WordPress website’s URL
- Select an industry category
- Select a reporting time zone
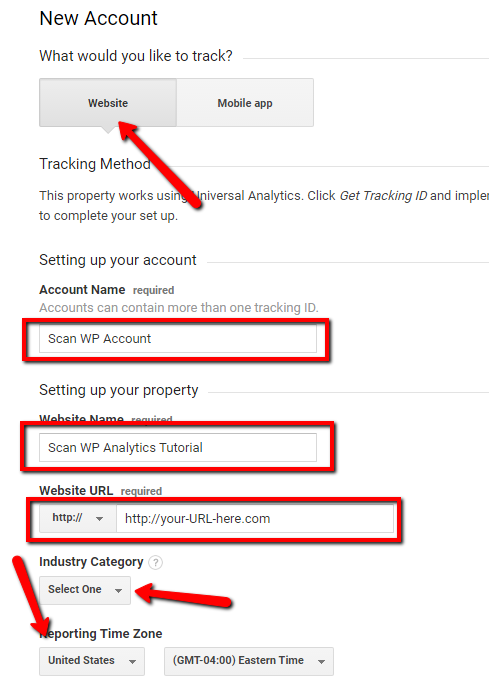
Once you finished adding YOUR relevant information, scroll to the bottom of the page and click on the “Get Tracking ID” button.

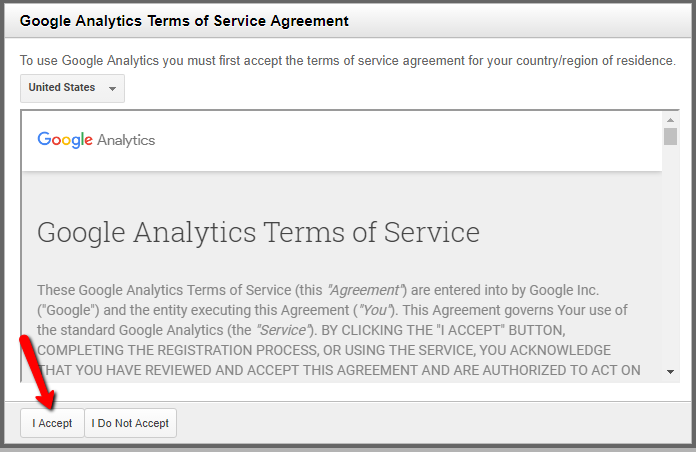
Once clicked, you will be prompted with Google Analytics’ terms of service agreement – click the “I accept” button.
After clicking the “accept” button, you will be directed to the account page where you will find the Google Analytics script that needs to be added to your WordPress site:
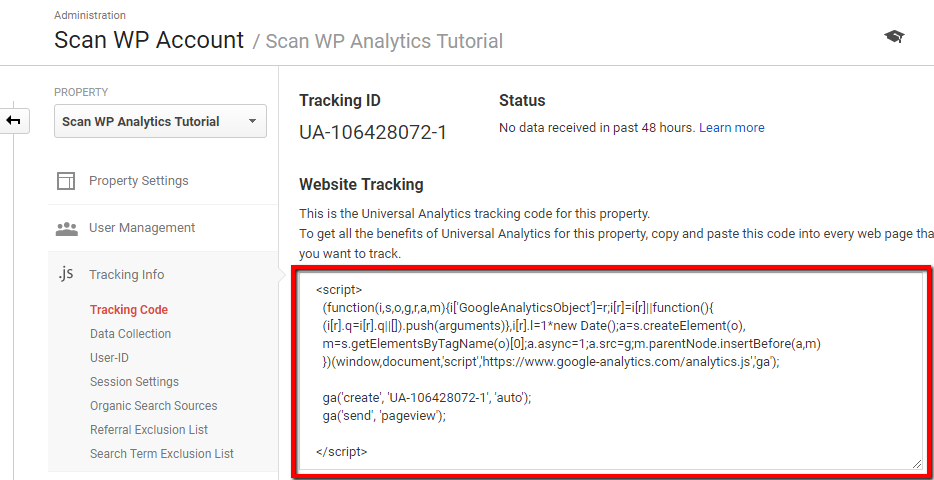
We recommend saving this code in a separate notepad file for now, just to have it accessible when you need to add it to WordPress. This is the last step for creating an Analytics account. The next step is adding your Google Analytics code to your WordPress website.
How to Install Google Analytics on Wordpress
There are 2 approaches to installing Google Analytics on WordPress or any other script for that matter such as Facebook or Google pixels. If you are a developer and feel confident adding the code into your WordPress theme’s files, that would be the best approach. If you are just starting off or are even very knowledgeable with WordPress but just don’t know code – you should use the second approach which is to add a plugin.
There are 2 different types of plugins we recommend you use:
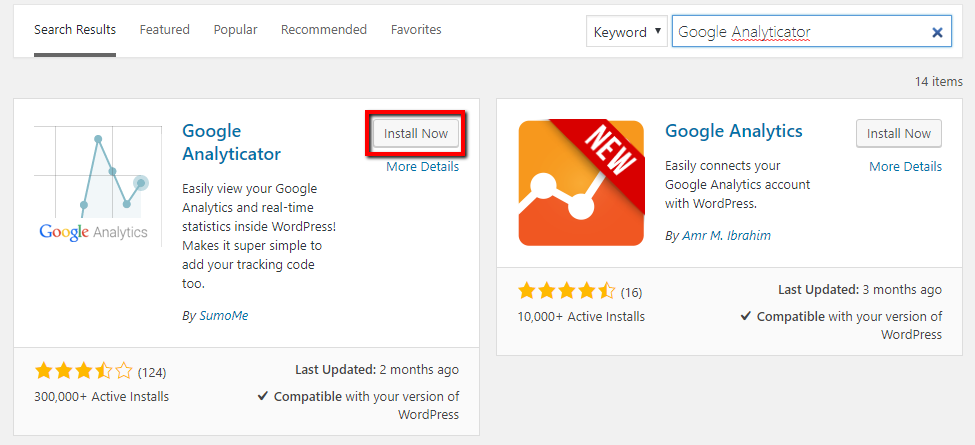
1. Google Analyticator

Install Plugin
click on the add plugins button on the sidebar, search for “Google Analyticator” and click “install now” on the correct plugin.
When the installation is finished, click the blue “Activate” button.
Next you will see that a “Google Analytics” button was added to your sidebar, click it. Next you should see a window similar to this:

What you need to do is click on the “click here” button (where the red arrow points to) or on the other button if you have popups disabled. The popup will ask you to choose your Google account (if you have more than 1 opened) and then ask you to allow the plugin to access your Google Analytics account:
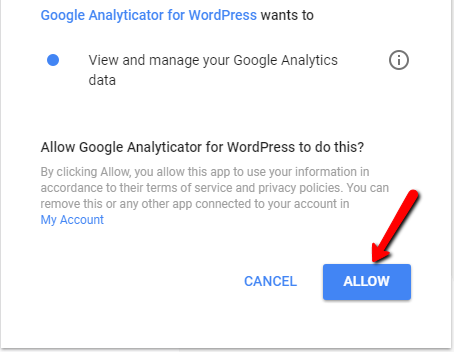
Next, click the “Allow” button which will allow the plugin to access your account. Pressing the button will then give you a code:

All you need to do is copy the code, go back to the “Google Analyticator” page and paste the code there:
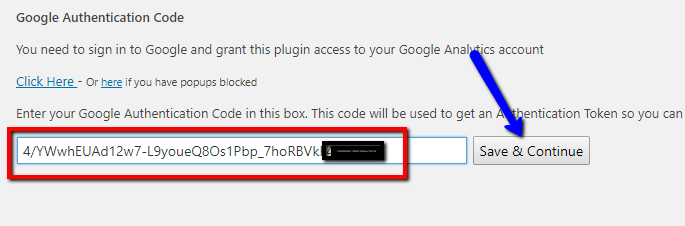
Next, click the “Save & Continue” button as displayed in the above image.
Next, you should see a page similar to this:
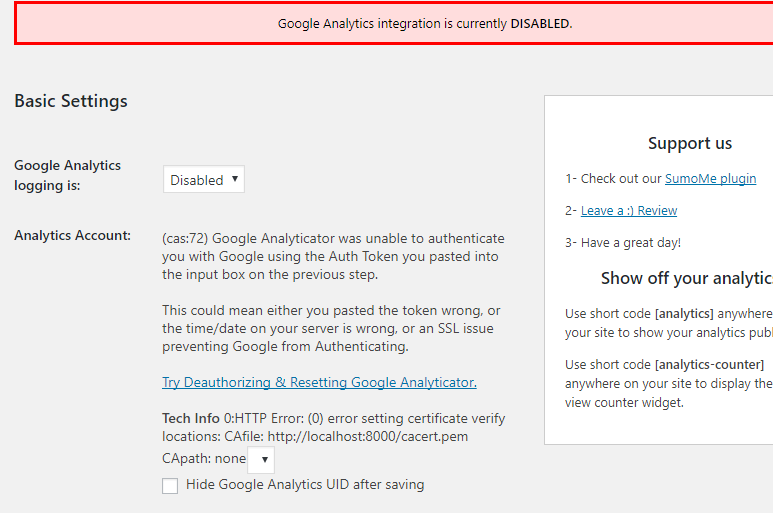
As you can see, there is a frightening red message above but not to worry. All you have to do is open the top drop down menu and choose “Enabled” and save the page. There are several more settings you can play around with on the settings page but in general, your Google Analytics account should now be ready to go!
This was the first of 2 different types of plugins we recommend. The second type of plugin is a plugin that enables you to add code to the site’s head / body / footer etc. Meaning, this is a bit more “techie” but still pretty simple.
2. Insert Headers and Footers

Install Plugin
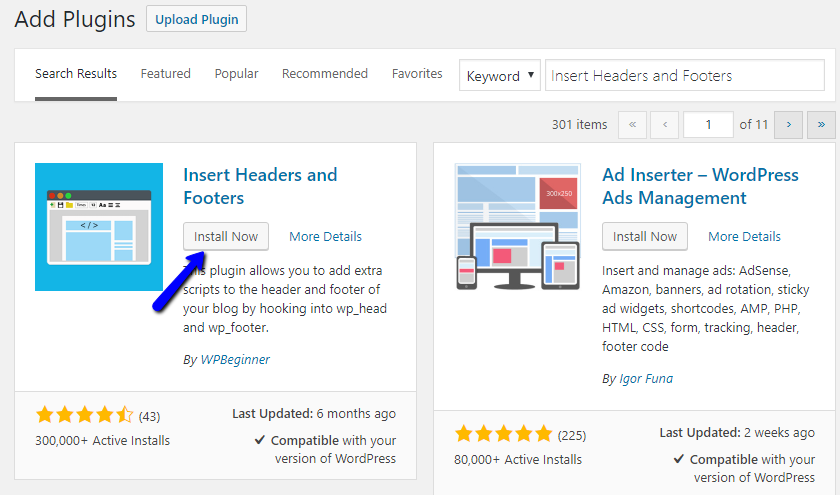
First of all, just like in the previous section, let’s go to the plugin section and add the “Insert headers and footers” to our WordPress site.
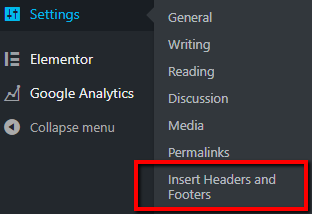
After installing and activating the plugin, let’s go insert our WordPress code into it. Navigate to your settings tab and choose the “Insert Headers and Footers” link:
Next, navigate back to your Google Analytics tab and copy the script code we saw in the first section, or if you copied and pasted into a notepad file just copy that. Now in the “insert headers and footers” page we just paste the code into the header as displayed in the image below.

Now just hit the save button and you are done.
3. Insert Headers and Footers

Last and not least is “Insert headers and footers”. This plugin has been developed and updated recently and has many options that fit well with all the actions needed to be done on websites these days. This obviously includes Google Analytics, insertion of pixels in various forms and many more options.
These 3 plugins are all really easy to do and you can have your Analytics account up and running within minutes. The 2nd option is to put the Analytics code directly in our WordPress files.
How to Add Google Analytics Script in Wordpress?
The first option we have is to add the code directly into our theme’s header.php file. If you are a WordPress developer, most likely that you won’t change your theme in a while but be aware that changing a theme will mean that you’ll have to move the analytics code too.
All you need to do is open your header.php file via FTP and paste the Analytics code anywhere before the closing </head> tag.
The cleaner approach like anything else in WordPress is to add the code in your functions.php file. Just add the following code:
function analytics_script() { ?>

<script>
  (function(i,s,o,g,r,a,m){i['GoogleAnalyticsObject']=r;i[r]=i[r]||function(){
  (i[r].q=i[r].q||[]).push(arguments)},i[r].l=1*new Date();a=s.createElement(o),
  m=s.getElementsByTagName(o)[0];a.async=1;a.src=g;m.parentNode.insertBefore(a,m)
  })(window,document,'script','https://www.google-analytics.com/analytics.js','ga');

  ga('create', 'UA-XXXXXXX-X', 'auto');
  ga('send', 'pageview');

</script>

<?php }
add_action('wp_head', 'analytics_script');
This will automatically add the Analytics code to your head on every page thanks to the wp_head hook.
Is Google Analytics Working on Your Wordpress Website?
The last step is to make sure your Google Analytics is actually working. No matter which of the above methods you chose, go within your new Google Analytics account and choose the “real time” option and check if you see any users. Just make sure to refresh your webpage after adding the Analytics code.

If you see at least 1 user online – you’re done. Congratulations!
Related Posts


Offers & Promos
 Website Maintenance – Use Promocode: scanwp
  Advanced JetPlugins for Elementor
  Semrush 14 days trial
  Kinsta – Managed WordPress Hosting
  Bluehost Hosting
 One thought on “How to Add Google Analytics to WordPress”
Comments are closed.
Wow! this is a very detailed artilcle on how to add analytics to a site. I have been lookig for something like this for a while now.
Thanks very much