
Add Booking Functionality to Elementor with JetBooking Plugin
Last modified: January 13, 2020
Elementor rightly holds one of the leading roles among website builders. If you ever thought of enriching your site with booking appointments functionality or hotel booking plugin, you may find this article interesting. We’ll talk about one of the cleares
t and utilitarian plugins called JetBooking by Crocoblock.
* This button will show the rest of the post and open up an offer from a vendor
Get to know the JetBooking plugin
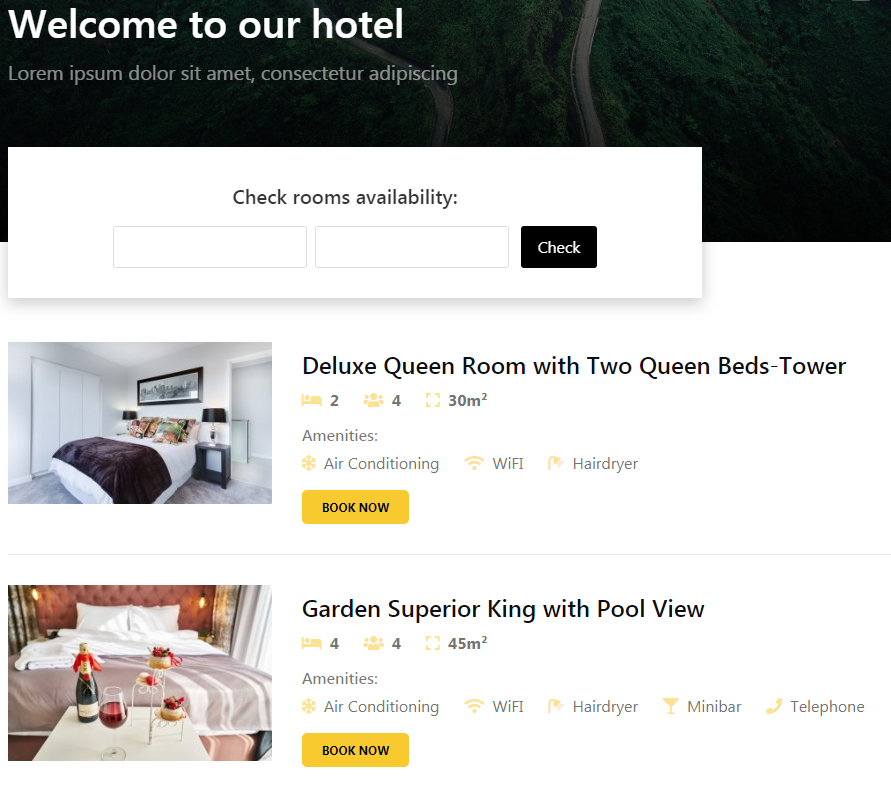
Particularly JetBooking’s important feature for site visitors is the opportunity to check the items’ availability for a certain period. As for the site administrator, the essential value is that the submitted requests are automatically saved in the database as well as in the form of custom posts in the WordPress dashboard.
Somebody may think that JetBooking is just a booking form, but its functionality is much wider. The plugin works in tandem with JetEngine and JetSmartFilters. Crocoblock combined these plugins in their Multi-tool set for a fare price. The crucial point is that you can check the items’ availability by specifying the date period (check-in and check-out dates). Those dates, for which the booking can’t be completed will be simply unavailable for selecting. Such functionality is really helpful when you have to manage a large number of items.
JetBooking + Plugins
JetBooking requires some other plugins to be installed in order to work to the full extent. You will be in the win as they offer wide opportunities for entire site. All right, it’s time to emphasize which plugins needed and what they do.
JetEngine: expert in dynamics
This plugin is tasked with creating and managing the dynamic functionality on Elementor-based sites. With its help, it is quite easy to create any custom post types and enrich them will meta boxes and complex relations. Below are main JetEngine features being highlighted:
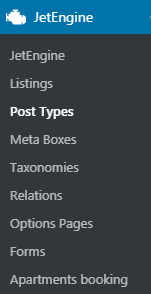
- Custom Post Types. There are loads of settings available for adjustment to fulfill the CPTs with the most possible options.
- Meta Boxes. Currently, they can be assigned either to posts, taxonomies, and users. While there’s a wide selection of meta field types in JetEngine to display any type of content.
- Dynamic widgets. Anything you’ve added via meta fields can be shown with specially developed widgets. Everything is handled in Elementor, therуfore being set up on the fly!
- Forms. One of the most demanded functionalities. It allows building the most complex forms. Particularly, booking functionality is based on the Forms. But one thing at a time.
JetThemeCore or Elementor PRO
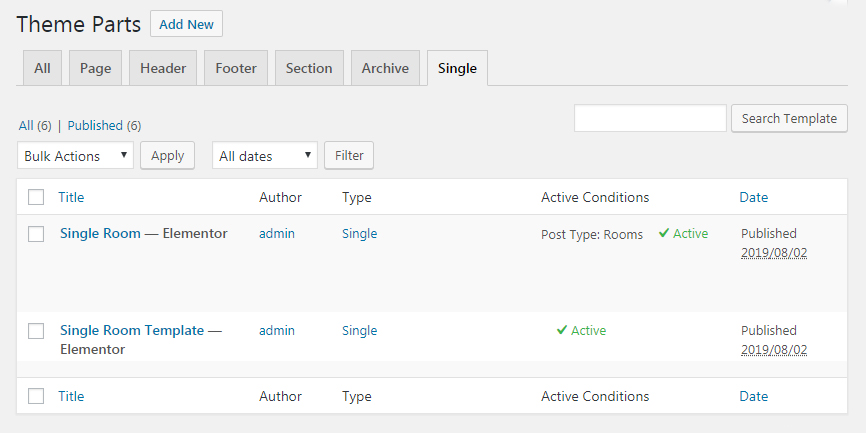
In order to build a fully-fledged booking form Archive and Single pages are must-have. If you’re an Elementor Pro fan JetBooking plugin will work with it just perfectly. At the same time, if you prefer using the Jet Family WordPress plugins, JetThemeCore will be your trusty assistant. The choice is yours: both plugins fully comply with the requirements and your booking system will run like clockwork.
JetSmartFilters: advanced filtering
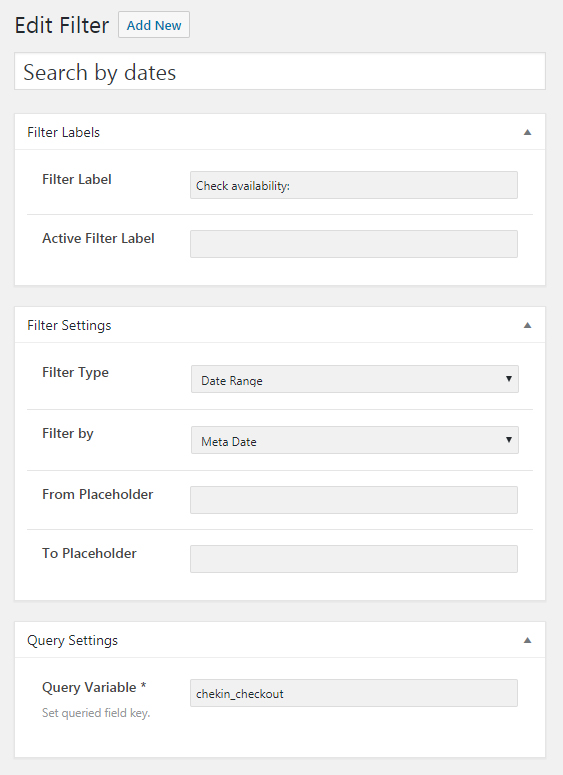
This plugin by Crocoblock is an optional one. Its main purpose is to let your visitors check out the dates they view for booking. The filter type which meets this aim is called a Date Range. It was enriched with a unique custom field key to work with a booking form. JetSmartFilters plugin is a user-friendly mechanism to add filters to your WordPress website.
Where to apply booking functionality to?
Booking functionality itself can be used for any kind of business on any WordPress website. If you’re running either a hotel, equipment or car rental business, you definitely need to allow your clients to book the items online. A good booking form should offer visitors the most complete information about your offer. People, in turn, should be able to fulfill the fields quickly and clearly. Let’s see what is necessary for each type of niches.

Hotel booking
Hotel or accommodation per stay do require a booking form. It’s important to represent all the information relating to the living conditions. Potential clients should have the opportunity to select the type of room, provide the number of people, add contact information and other. What is more important, people should be able to select the dates to schedule their plans.
Car rental
If somebody needs to rent a car, he or she would obviously like to select the best one suiting the requirements. The booking form, in this case, should offer to choose a car model, a year, a gearbox type, etc. Also, it is important to get the correct data from a client. An offer to agree on a car damage protection is crucial as well as a rental period.
Equipment rental
Any type of equipment can be booked, particularly in the case of heavy machinery or camping equipment. Such items are essential for use, but expensive. If your business is leasing, an online booking form will make it easier to keep a record. The must-have fields to be fulfilled are the client’s personal and contact information and estimated rental period.
Exploring JetBooking plugin in use
Well, you know the basics of a booking form content and layout. It’s time to see the strength of JetBooking plugin coming with indeed great features to operate with. Let’s get a closer look at the steps of creating a booking form in Elementor with JetBooking plugin by Crococblock.
Custom Post Types and Listing setup
Assume, you are the owner of a small hotel in need of establishing a booking functionality on your website. The first thing is to make sure you’ve got installed all the plugins described above (JetBooking, JetEngine, JetThemeCore or Elementor Pro, JetSmartFilters).
You need to create a Custom Post Type for your hotel rooms by means of JetEngine plugin. Let its name be “Rooms”. You are free to build any post layout and add as many meta fields as you need. Keep in mind that those meta boxes will be furtherly used in a booking form.
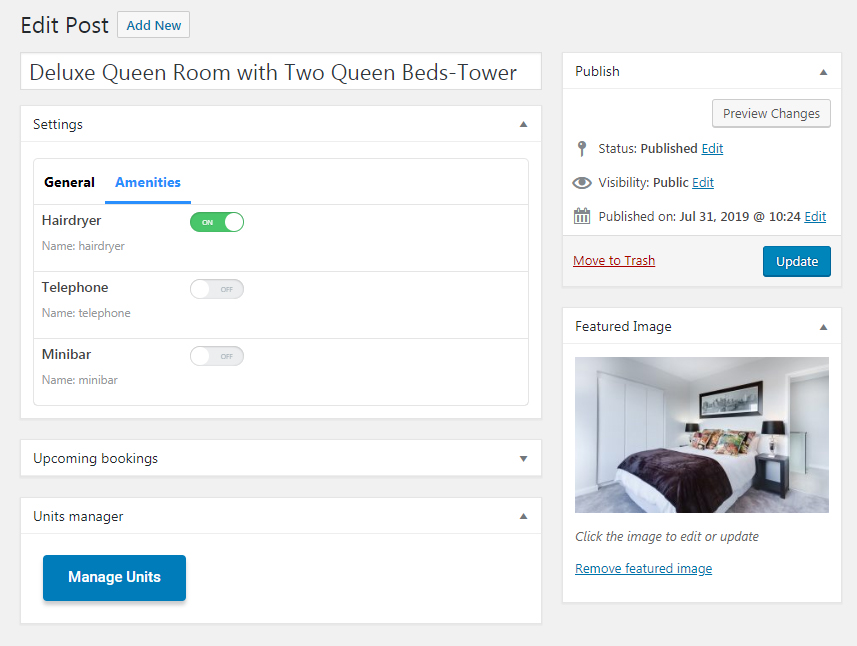
Also, a second CPT will be needed. In this CPT you will receive information about reservations. In other words, it will be orders storage. For easy reference, name it “Booking Orders”.
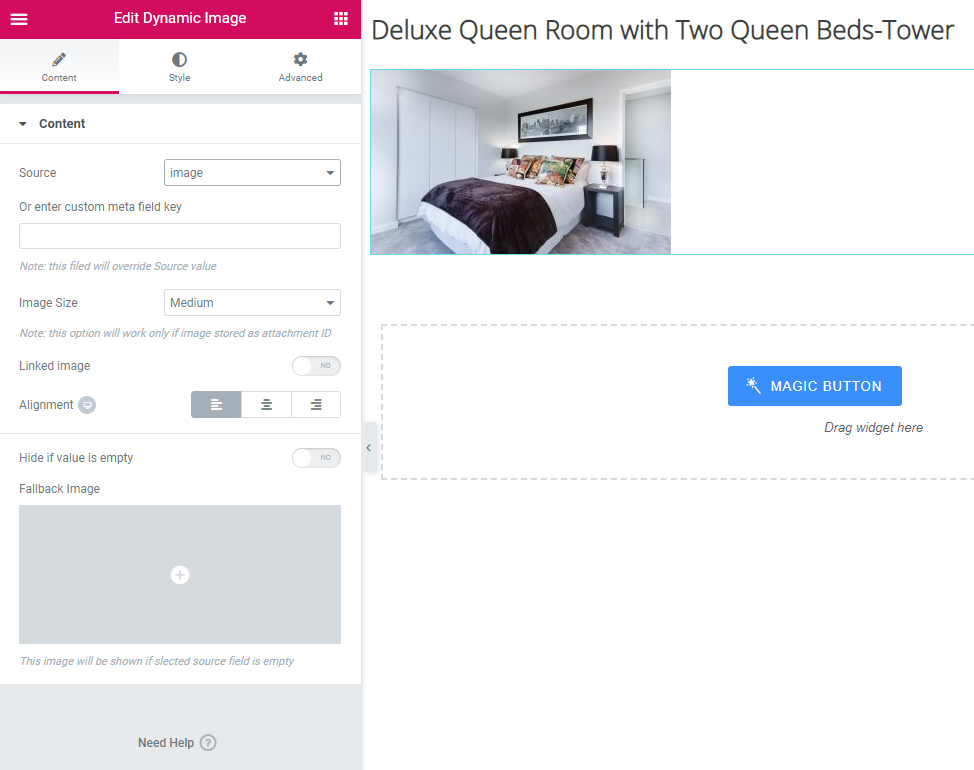
Once CPTs are ready it’s time to proceed with a Listing creating. When building a Listing layout it’s necessary to use Dynamic widgets of JetEngine to pull the data dynamically. Their advantage is that you use Elementor’s drag and drop interface to style everything up.
Managing Archive and Single pages
The Archive page is needed to display the Rooms CPT in a form of Listing Grid offering your visitors a full selection of your rooms. What about the Single page, here you need to create a layout of one room, which will dynamically inherit the data from the CPTs. Here a booking form should be inserted. Continue reading to know how it can be done.
Booking table structure
JetBooking plugin works in such a way that information submitted by the users is being transferred to the database. Before building a booking form itself you need to create a table. Here it’s your choice to indicate the structure. After a client submits a booking, the information will be sent to the database as well as duplicated to your prepared CPT for future orders.
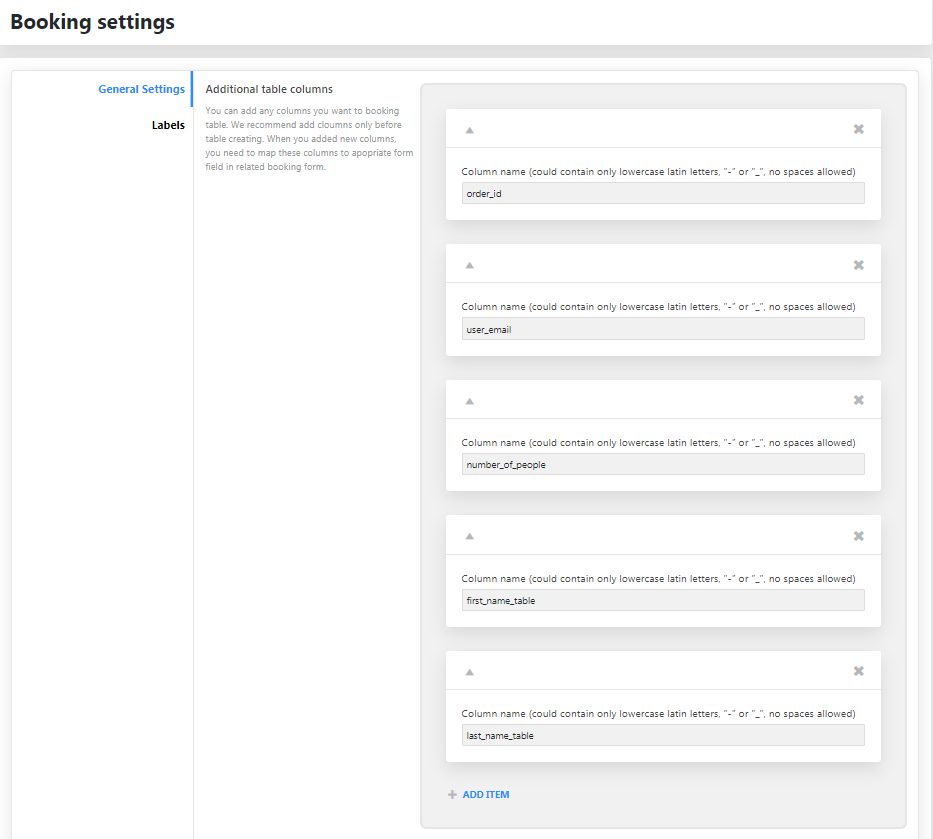
So, create your columns, for example, like these ones:
- order_id;
- user_email;
- number_of_people;
- first_name_table;
- last_name_table.
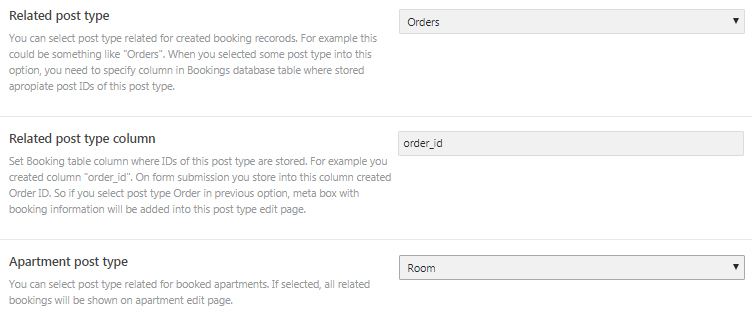
Then, the relations between two CPTs should be established in the corresponding fields. Before saving the table structure you need to make sure everything was built correctly, otherwise, you’ll have to delete the table in the database and start over again.
Booking Form adjustment
We’ve reached the stage on which a booking form should be created. This functionality comes with JetEngine plugin, thus its booking part is available with Jetbooking. Particularly, it provides additional field type called Check-in/ check-out dates. This detail allows visitors to specify the period of their room reservation.
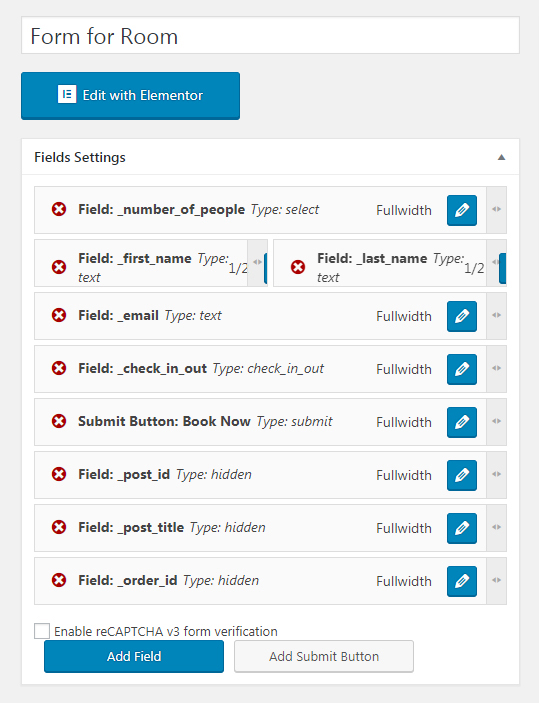
Apart from other settings, it’s crucial to utilize the so-called Notifications Settings block. There are three types of notification needed to be managed:
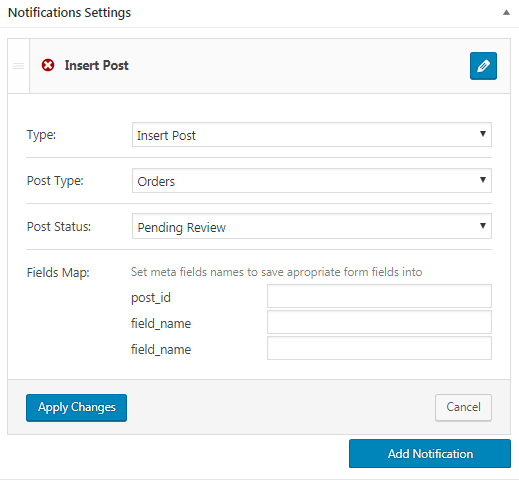
- Insert Post Type. It’s responsible for pulling the information from the completed booking form fields into the CPT called “Orders”. This is a place where future orders will be submitted to.
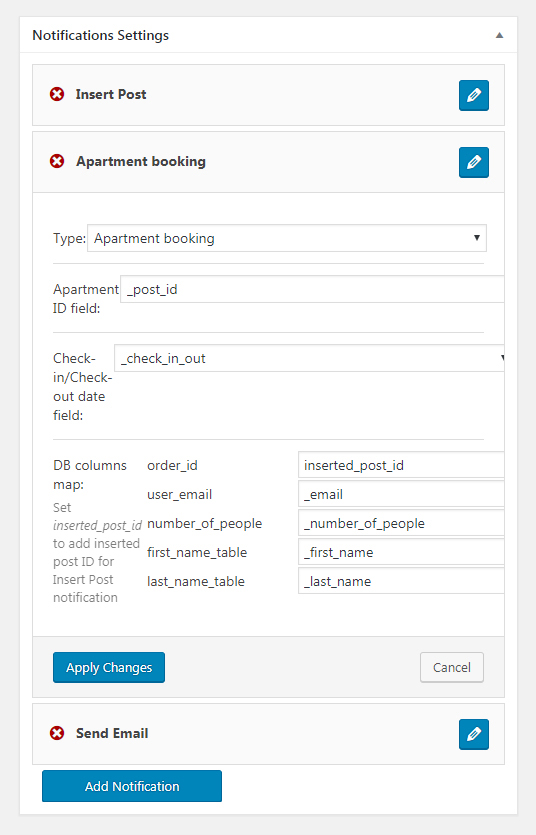
- Apartment Booking Type. This type assists in connecting the Check-in/Check-out date field’s data with the Orders CPT.
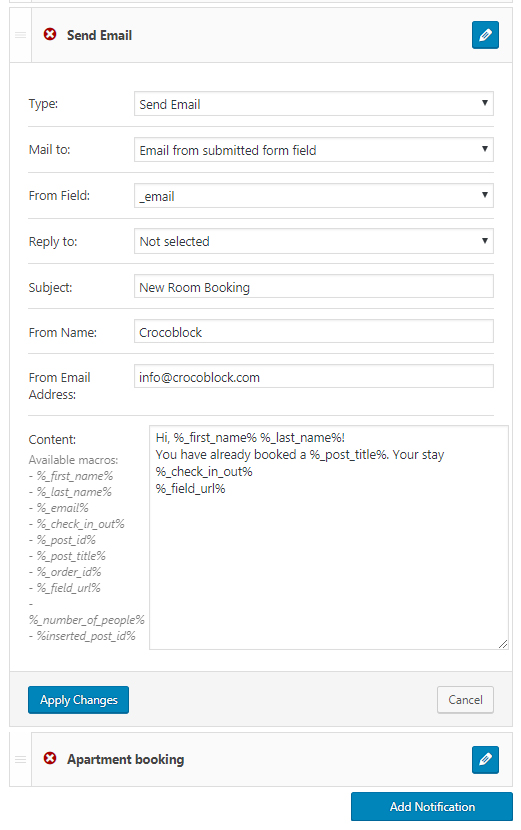
- Send Email Type. In short, this type will send a notification email to your client once he or she submits a booking form.
Booking Form on Elementor page
Remember we mentioned that either Elementor Pro or JetThemeCore is needed? With any of these plugins open your Single page with Elementor and drag and drop the Order Form widget. Adjust the Style settings and go ahead to check how it works on the frontend!
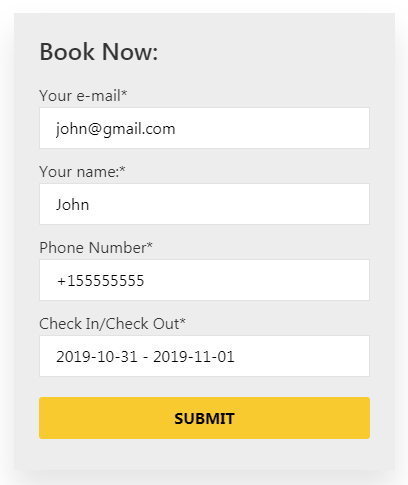
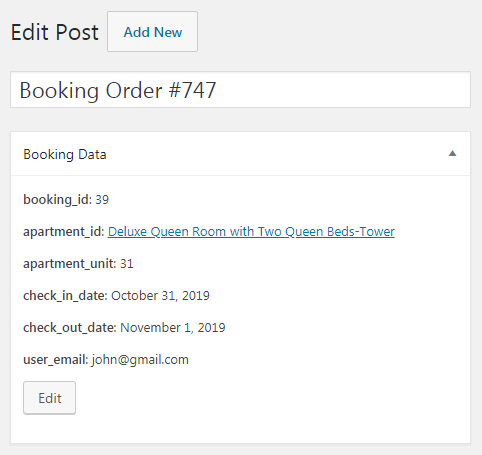
As soon as you tested the booking form’s action, navigate to phpMyAdmin to check how the booking table was created. Also, go to the WordPress dashboard and find your Orders CPT to check how the new order was created after the successful form submission. Those orders can be further edited and managed by the site administrator. Below we’ll overview what else the admin can do.
Enriching booking form with the filters
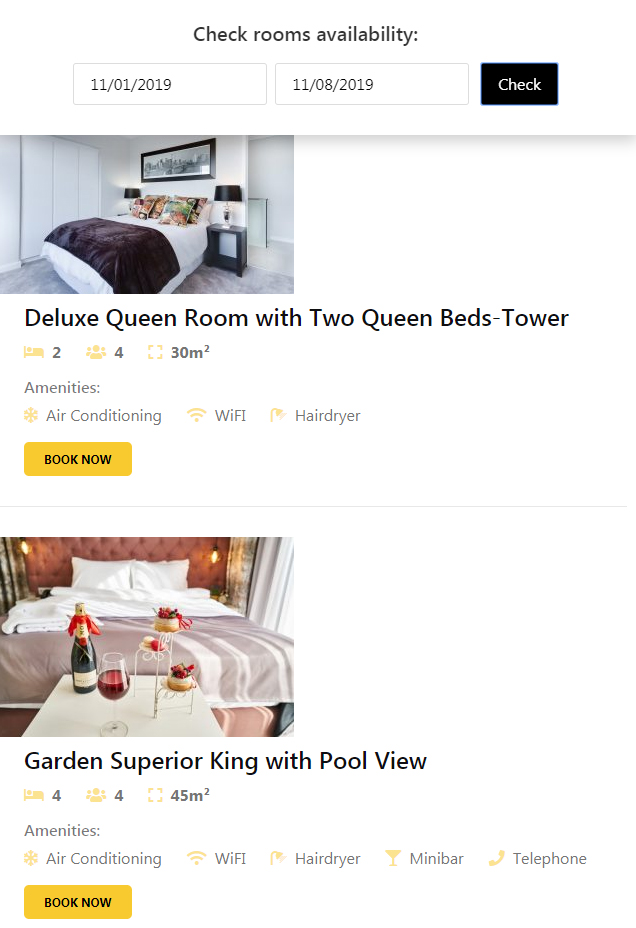
JetSmartFilters plugin and the Data Range filter type will offer your clients additional opportunity — checking the room’s availability before booking it. It’s possible with a specially developed checkin_checkout key, which should be inserted in the Query Variable field when filter setup. As a result, the dates, for which the room is unavailable was done won’t be possible to select. Quite handy, isn’t it?
Google Calendar sync
JetBooking plugin has a neat feature — it allows connecting your data with the Google Calendar so that a site administrator gets an extended control over the orders. Currently, there are two ways to connect the booking form with the Calendar via popular online services. Let’s check them out.
Automation with Zapier
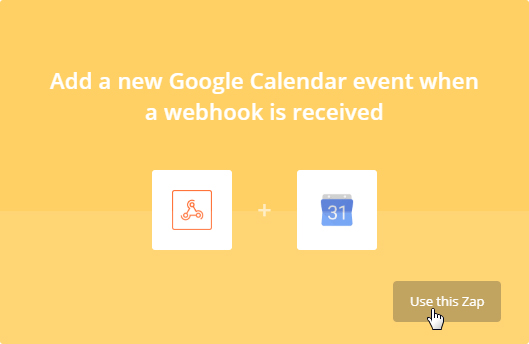
Zapier is a popular online service helping to build connections between various apps. Speaking of JetBooking plugin, it assists in hooking up Google Calendar. Also it synchronizes it with the submitted orders in WordPress dashboard. It’s a great solution for the site administrator as he can manage the orders right from Google account. Form in JetBooking contains a field called Call a Webhook, where you simply input a hook created in Zapier.
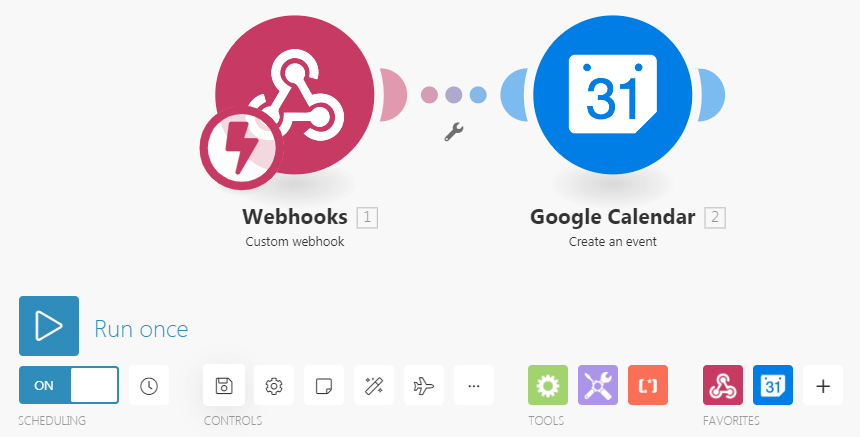
Integromat scenario platform
Integromat service is a great deal for those who operate with multiple apps and sites. If you need to sync your orders with Google Calendar you may try it. It allows creating a webhook and use it in your Form. Also, in Integromat you are able to set the time period when the synchronization is made or do it manually whenever you need. Quite a flexible tool to automate the order processing.
Conclusion
So, here’s what JetBooking is — an essential and constantly evolving plugin. Light and breezy way of using booking functionality on Elementor-built sites. It is intended to provide your visitors with a booking form and help site manager to operate with the orders promptly. Crocoblock relies on this promising plugin and continues boosting it over and over. In the future it will impress you with expanded options and additional components.
- Get to know the JetBooking plugin
- JetBooking + Plugins
- JetEngine: expert in dynamics
- JetThemeCore or Elementor PRO
- JetSmartFilters: advanced filtering
- Where to apply booking functionality to?
- Hotel booking
- Car rental
- Equipment rental
- Exploring JetBooking plugin in use
- Managing Archive and Single pages
- Booking table structure
- Booking Form adjustment
- Booking Form on Elementor page
- Enriching booking form with the filters
- Google Calendar sync
- Automation with Zapier
- Integromat scenario platform
- Conclusion


 Website Maintenance – Use Promocode: scanwp
  Advanced JetPlugins for Elementor
  Semrush 14 days trial
  Kinsta – Managed WordPress Hosting
  Bluehost Hosting