Create a Local WordPress Website with XAMPP
Last modified: June 18, 2026

Professional WordPress developers create local websites on their computer using XAMPP which emulates a server, allowing you to do everything local. Creating a local website with XAMPP is good for a few reasons:
- Speeds up the development process
- Enables you to screw things up locally before pushing them to a live server
- Check out WordPress and plugin updates before you do them live
- Enables the use of pre processors
- It’s a free choice if you just want to learn about WordPress
* This button will show the rest of the post and open up an offer from a vendor
Installing XAMPP on Your Computer
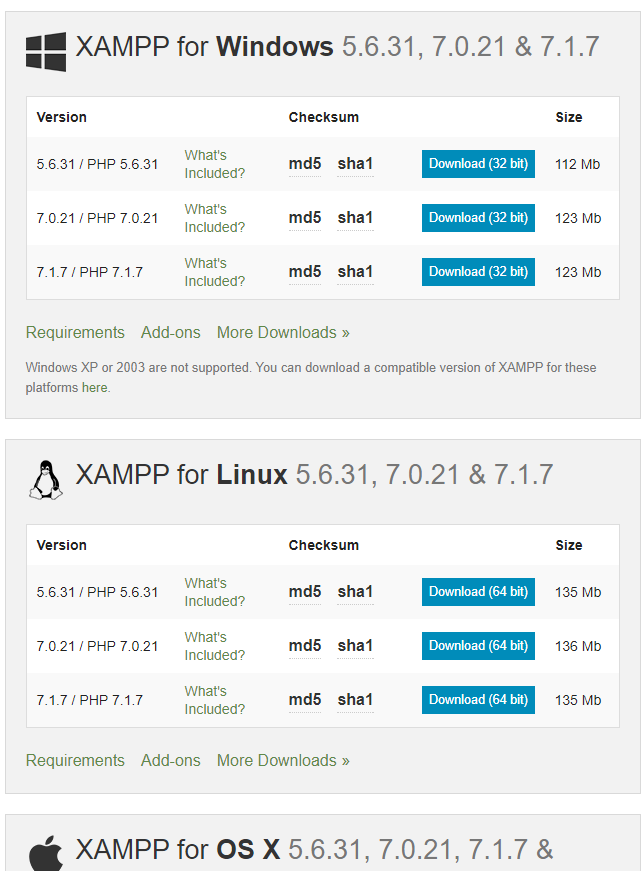
Go the the Download XAMPP page, choose your operating system and version and hit the download button.
After the XAMPP file is downloaded to your computer just click “next” a few times on the wizard and XAMPP should be successfully downloaded to your computer and just about ready for use. Now lets open up XAMPP and take a look at the interface. This is what you’ll see:
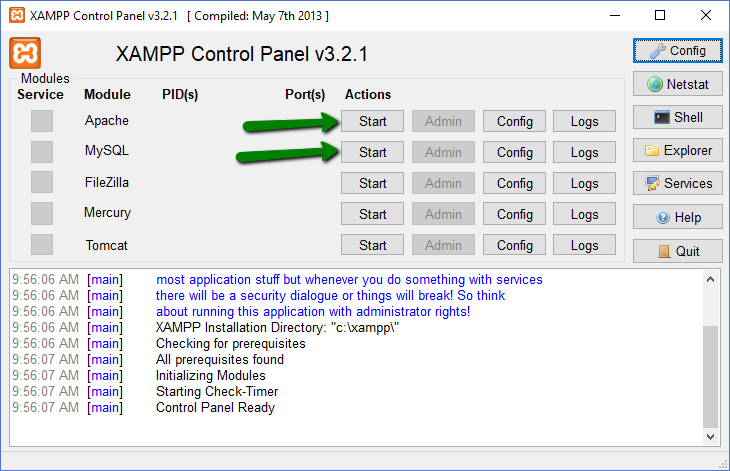
All you need to do is click the 2 top “start” buttons and wait for the server to start up. I should mention that XAMPP does npt work very well with Skype when starting up, so before you hit the start buttons just turn Skype off for a second and then re launch. Assuming everything went ok, you’ll see 2 green squares indicating that the server and MYSQL are running properly.
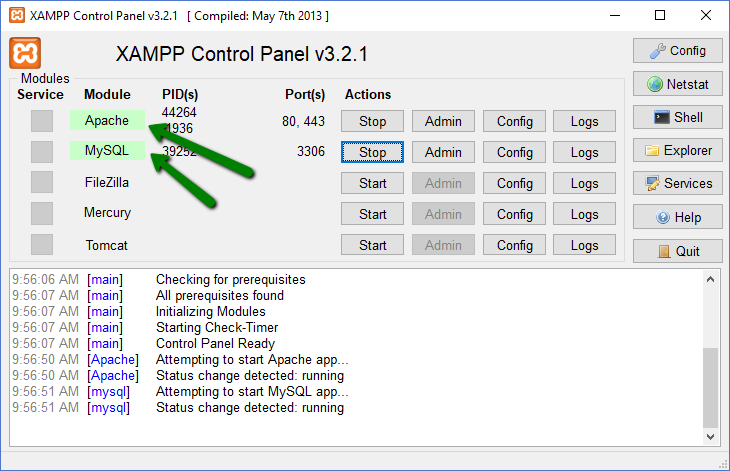
That’s it. you now have a fully functional local XAMPP server running on your computer. The next step is to create our local WordPress website.
Creating a Local Wordpress Website with XAMPP
Let’s head over to WordPress.org’s download page in order to download the latest WordPress version.
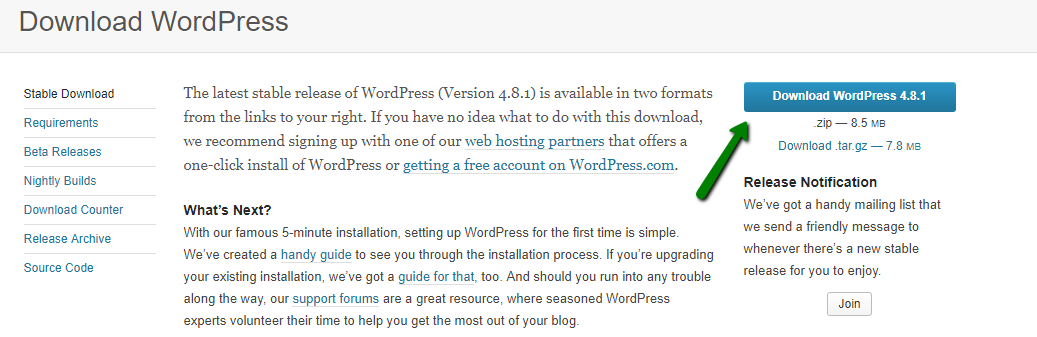
After clicking the download button, the zip file should be on your computer. Click the zip file and extract the files. Within the extracted files there should be a WordPress folder. Take that folder and head over to: C:xampphtdocs
htdocs is the root folder of your new XAMPP server. any new website that you want to build will go here. For the sake of this XAMPP tutorial, let’s name our new WordPress website – “xampp-test”. Remember the WordPress folder you were suppose to take out of the extracted files? Paste it here and change its name to “xampp-test”. Now head over to your browser and type in: localhost/xampp-test.
Adding a Local Database for Wordpress
In order to create a “real” local WordPress website with XAMPP we need a database. So, head over to your browser and go to “localhost/phpmyadmin”.
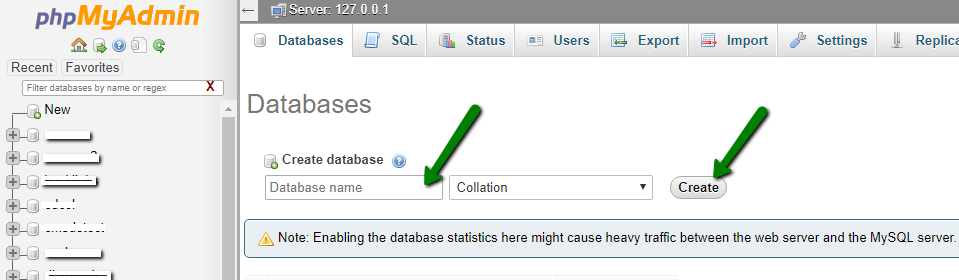
- Click on the top left “new” button
- Create a new Database, lets call it “xampptest”
- Click “create”
3 simple steps that take less than a minute, now let’s let WordPress do its magic.
Installing a Local Wordpress Website with XAMPP
Let’s go back to the “localhost/xampp-test” page. This is what you should see.
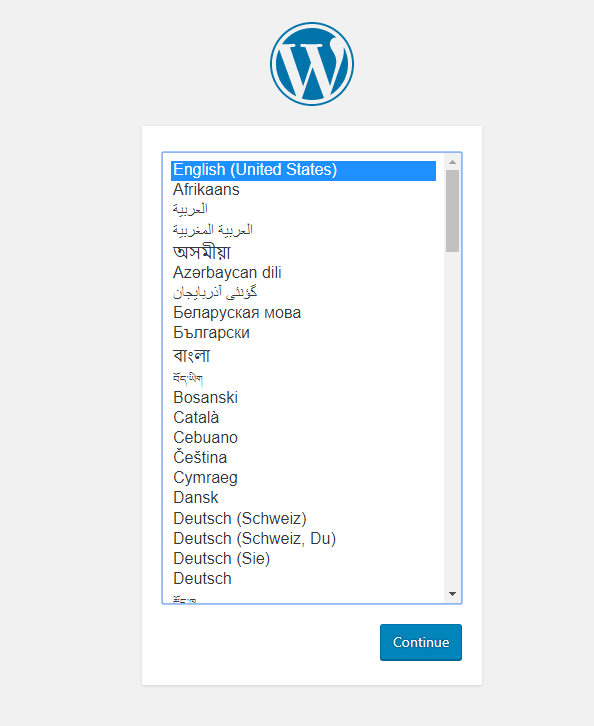
Choose your preferred language and click “continue”.
Now WordPress is warning us about what’s coming next and that we will need to know the DB name, username etc.
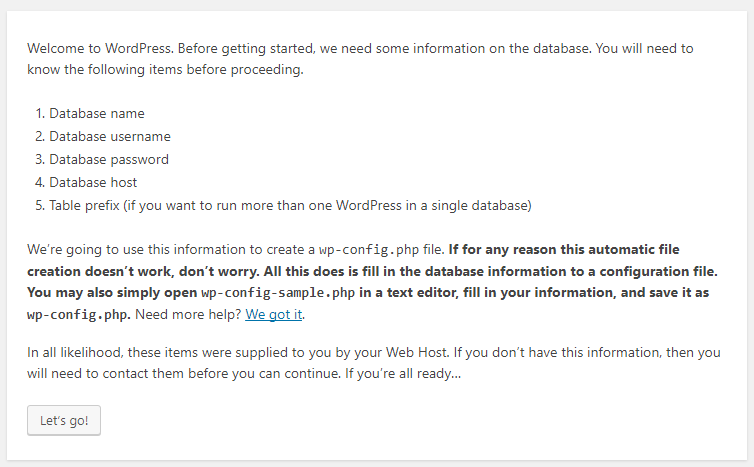
Just hit “Let’s go!”
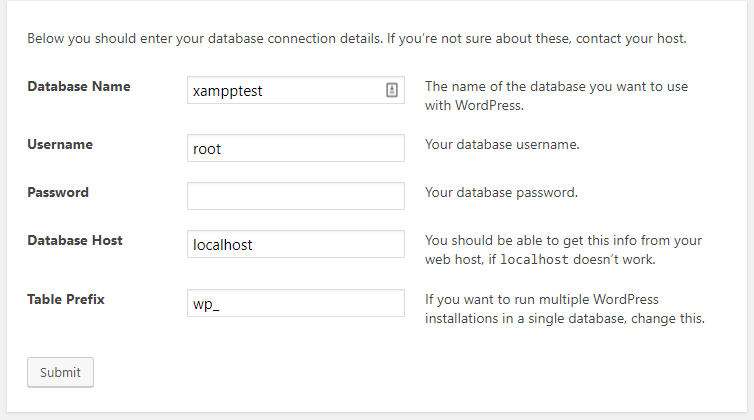
As you can see in the image above, I went ahead and filled in what you need too. Here is the explanation:
- Database Name – we chose that earlier when we created it
- Username – the DB username on localhost is always root
- Password – the password is always empty on localhost
- Database Host – no need to touch (usually not even on a live server)
- Table Prefix – I used the default, you can change if you want
All you need to do now is hit the “submit” button and continue.
If you followed every step here correctly, you should see this now:
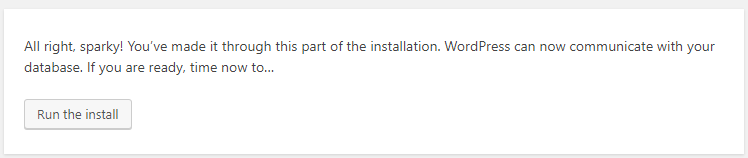
Just hit the button and continue.
You made it to the last screen. Congratulations!
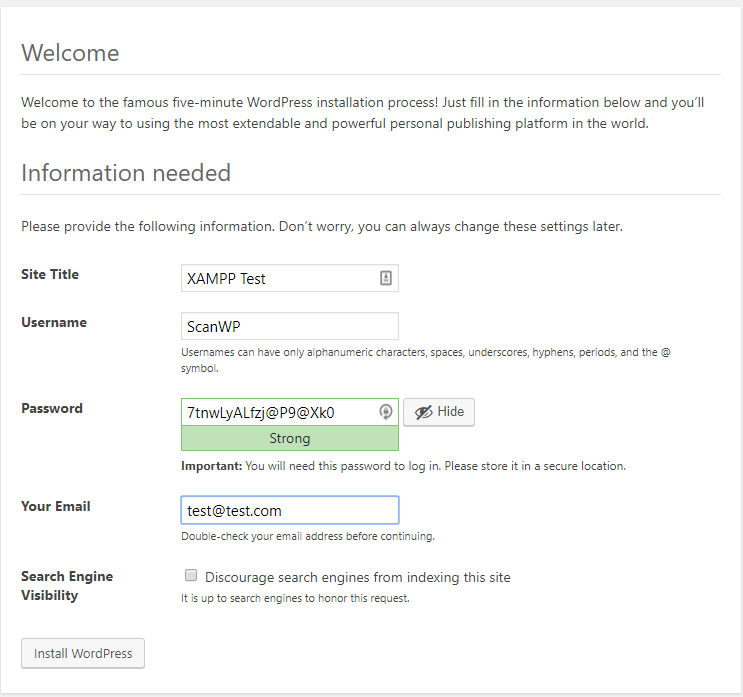
This is what you need to do on this step:
- Site title – this will appear at the end of your titles if not changed, in your admin bar (as an admin) and sometimes even in your header, depending on the WordPress theme you use
- Username – the username will be used to login to the backend and edit the site
- Password – Pretty self explanatory 🙂
- Email – used for important things that need to be sent to you
That’s it!
Click “install WordPress”, wait till the install is done and go to “localhost/xampp-test” and see your local WordPress website using XAMPP.
Conslusion
So what did we do here?
We installed XAMPP on our computer, creating a local server, allowing us to create websites locally on our computer and not put them on a live server. This is great for development process, learning purposes, testing our updates and just better practice.
After installing XAMPP we created a local version of WordPress on our computer which we can start to develop.
That’s pretty much it. If you have any questions about installing XAMPP and creating a local WordPress website feel free to comment and we will get back to you pronto.
Related Posts


 Website Maintenance – Use Promocode: scanwp
  Advanced JetPlugins for Elementor
  Semrush 14 days trial
  Kinsta – Managed WordPress Hosting
  Bluehost Hosting